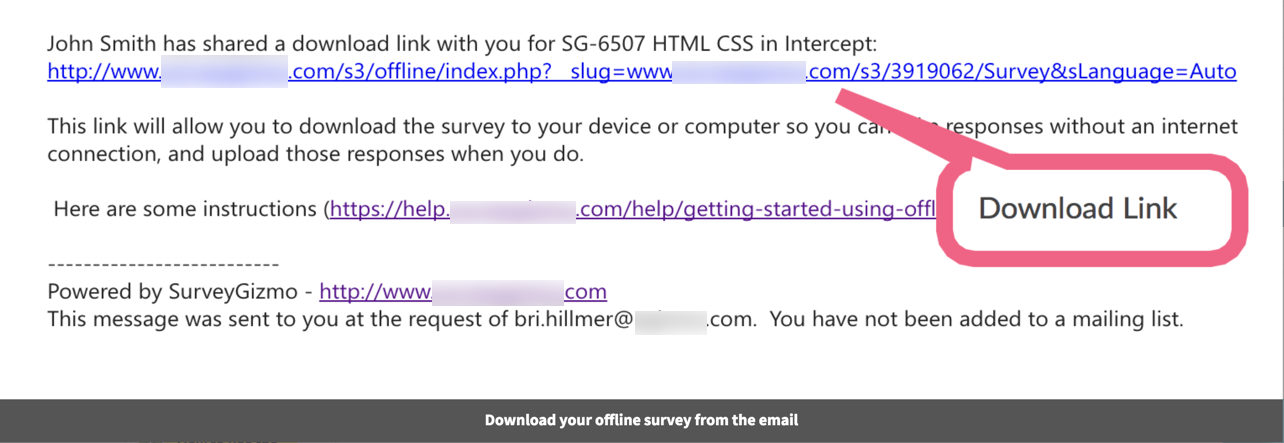
So, you've received an email with a link to a survey (see example email below), now what?
The survey's administrator has sent you this email so that you can collect responses in the field. This link is special because it allows for collecting data when there is no internet connection. In this tutorial we'll cover how to successfully use this link.
Check out our Offline Feature Guide if you are looking to learn how to set up an offline survey.
Tips for Successful Use of Alchemer's Offline Surveys
- Make sure you plan to use a modern browser and device. See our list of supported browsers and devices for more info.
- Make sure that Private Browsing is turned off on your device. Offline mode uses the application cache to run properly. When private browsing is enabled, no history will be recorded to the application cache thus preventing the Alchemer application from working properly.
- Make sure that you test the survey offline on the device you plan to take into the field. Testing on a different device from the one you plan to go into the field might lead to unexpected results.
- Practice viewing reports and uploading data.
Step 1: Download your offline survey link
- To get started you'll need to download your offline link. To do so, go to your email and click the download link.
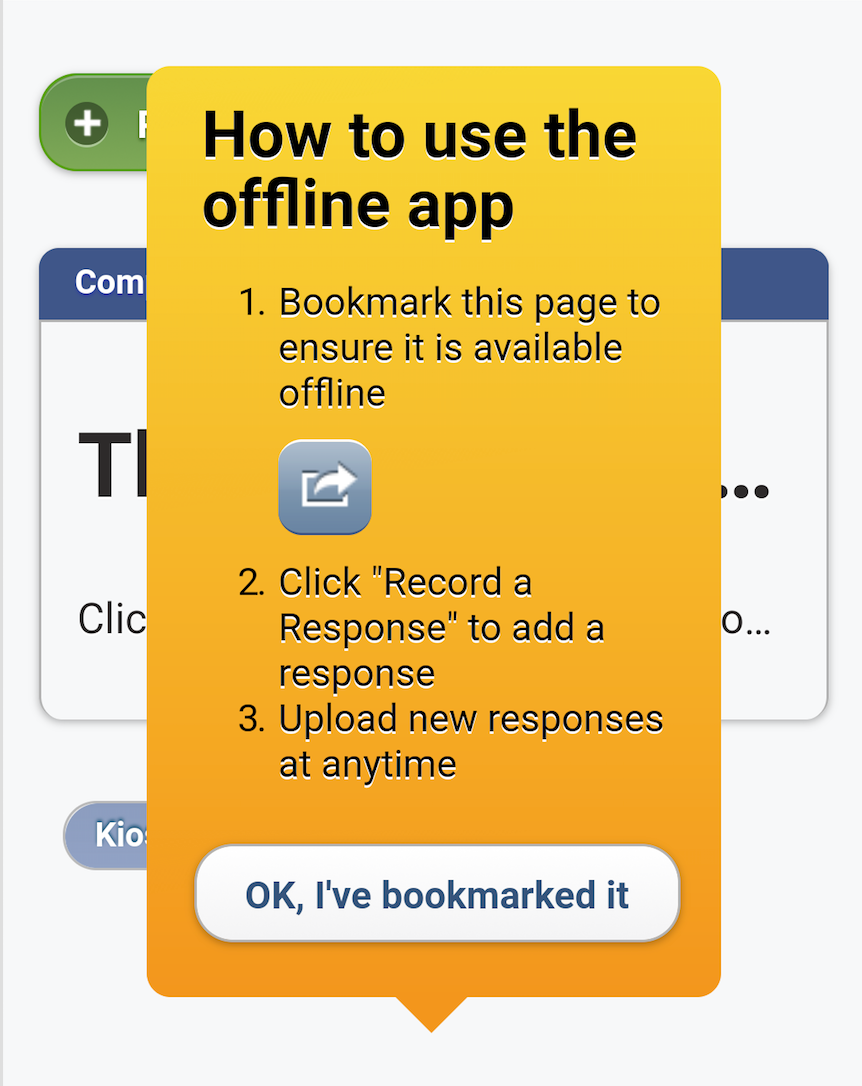
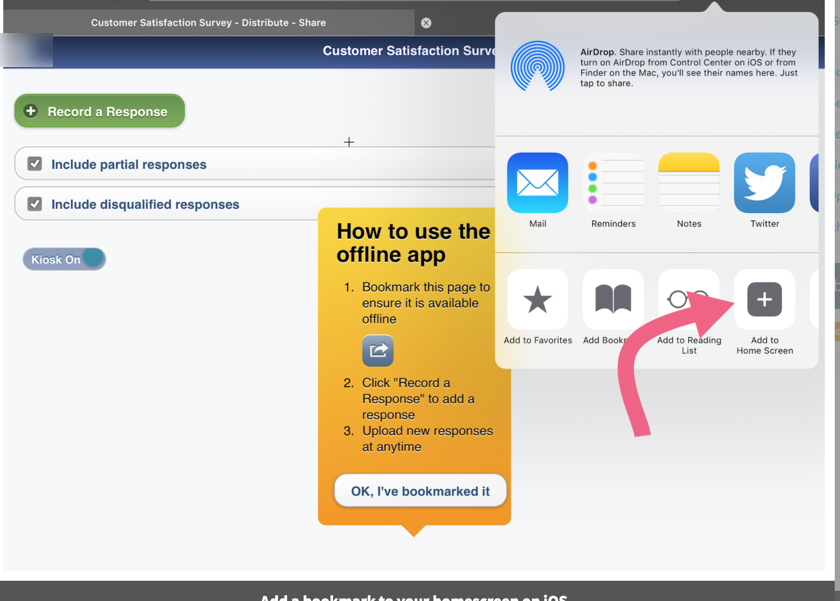
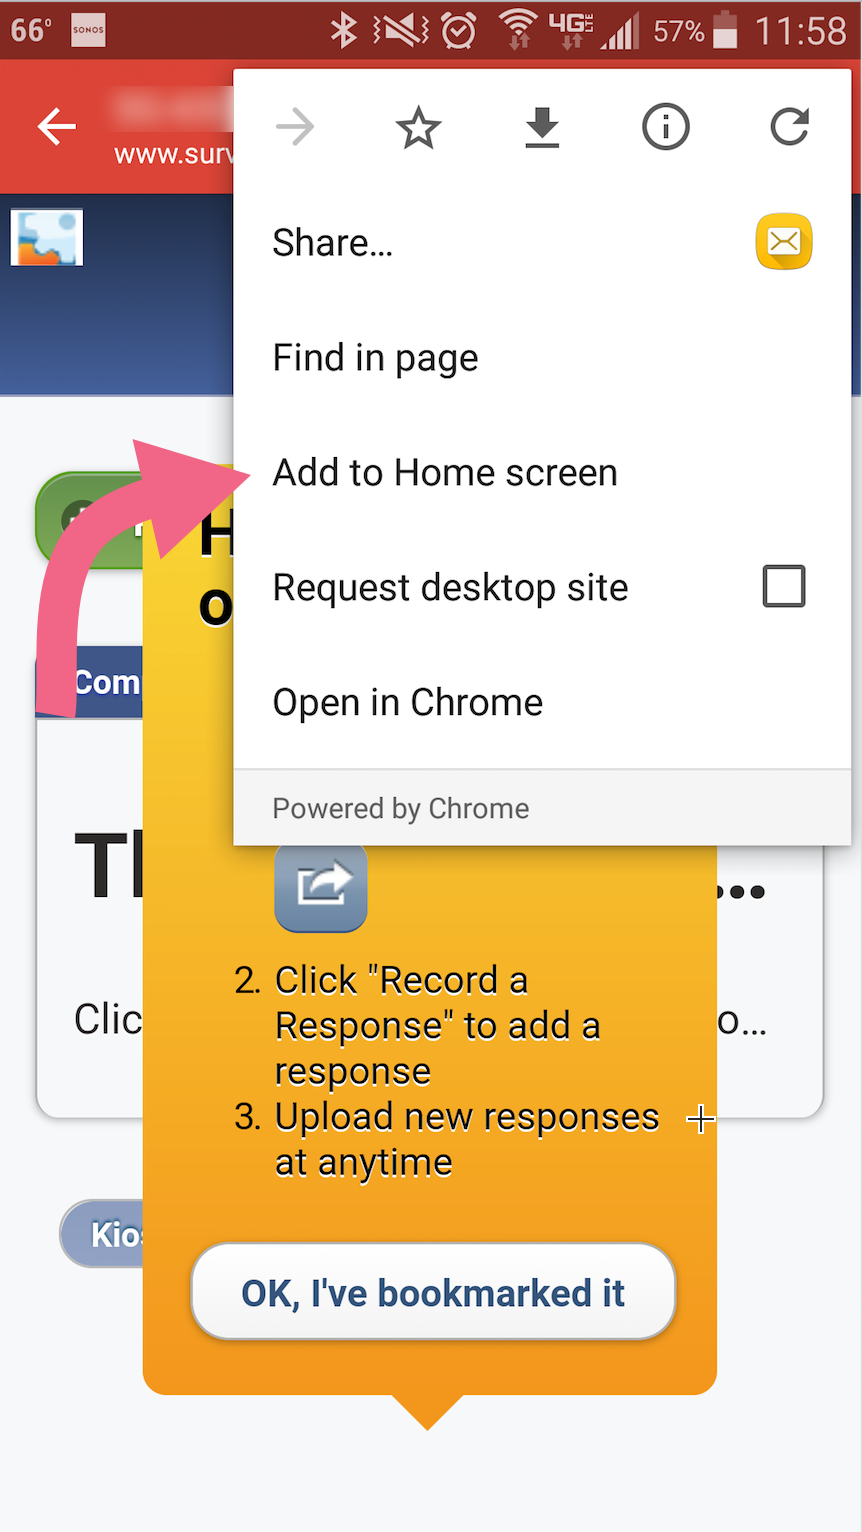
- After your offline link downloads, a message will appear reminding you to bookmark the page so you can access it in the future. You must have an internet connection when setting up your bookmark.
- Use the option to Add to Home Screen in iOS.
- Use the Add to Home screen option on Android.
- Use the option to Add to Home Screen in iOS.
- Once you're done creating a bookmark, tap or click OK, I've bookmarked it.
Step 2: Get oriented with the offline dashboard
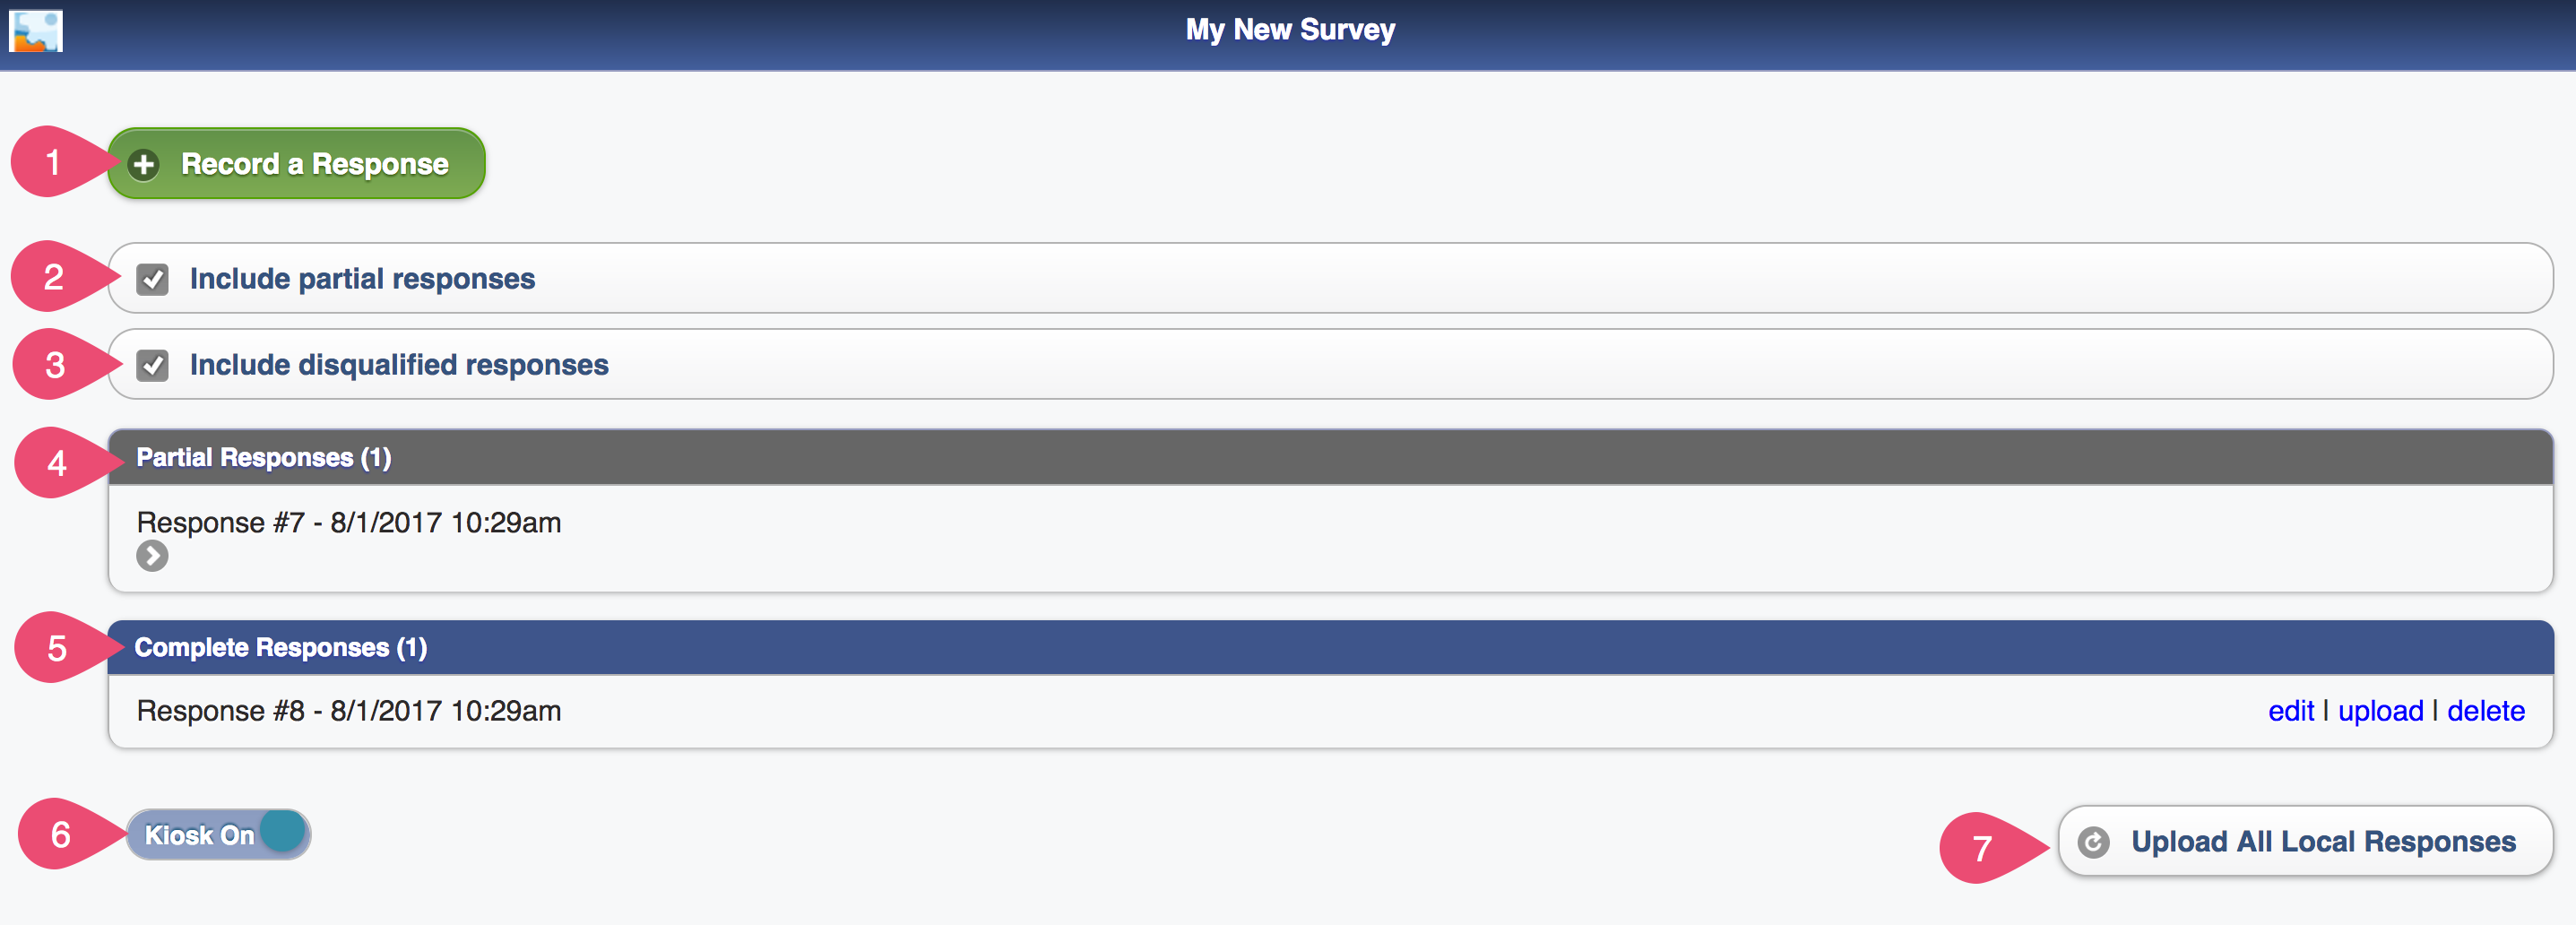
Now that you've downloaded your survey to your device and bookmarked it, go ahead and turn off your internet connection. Here's an overview of the offline dashboard.
1. Record a Response - When you click this option, a new session will be created that will display your survey without having to be connected to the internet.
2. Include partial responses - When selected this will upload your partial responses when you click Upload All Local Responses. This option is selected by default.
3. Include disqualified responses - When selected this will upload your responses when you click Upload All Local Responses. This option is selected by default.
4. Partial Responses - This is a list of all partial responses taken on this mobile device. Your partial responses will populate here with a Response ID# and the Date and Time the response was recorded. (It is important to note that after upload the Date and Time stamp will update to the date and time the response was uploaded.)
5. Complete Responses - This is a list of all responses taken on this mobile device. Your completed responses will populate here and list the Response ID#, as well as, the Date and Time the response was recorded. (It is important to note that after upload the Date and Time stamp will update to the date and time the response was uploaded.) Next to the Date and Time is the option to Edit, Upload and Delete this response.
6. Kiosk Toggle - Kiosk Mode will reload surveys automatically. Every time a user reaches the end of a survey after 10 seconds on the Thank You page the survey will reload in preparation for another response. Use this toggle to turn Kiosk Mode on and off. Kiosk Mode is on by default.
7. Upload All Local Responses - After you've collected responses, this button will upload all completed responses to your survey within Alchemer. You can check the box to not include partial responses when uploading responses. Uploading REQUIRES an internet connection.
Step 3: Record an offline response
- Click Record a Response from the Offline dashboard.
- Take the survey. Once you're done, click Submit.
- After the response is submitted, there will be a 10-second delay and then the survey will return to the first page of the survey to record a new response. If you want to bypass this 10 second delay you can click Record Another Response and you'll be taken immediately to the first page of a new response. If you wish to prevent the reloading altogether you can turn off kiosk mode.
- If you are done recording responses, you can click View Responses and this will return you to the dashboard of your offline link.

Step 4: View your offline survey responses
When you return to your offline dashboard, you'll see your completed responses listed under Complete Responses and any partials listed under Partial Responses. You can return to any partial response to complete them by tapping or clicking on the response.

Step 5: Upload your responses
When you have an internet connection again, you can upload the responses stored on your offline dashboard.
- If you wish to upload a single response, find it in the list of Complete Responses and click Upload.
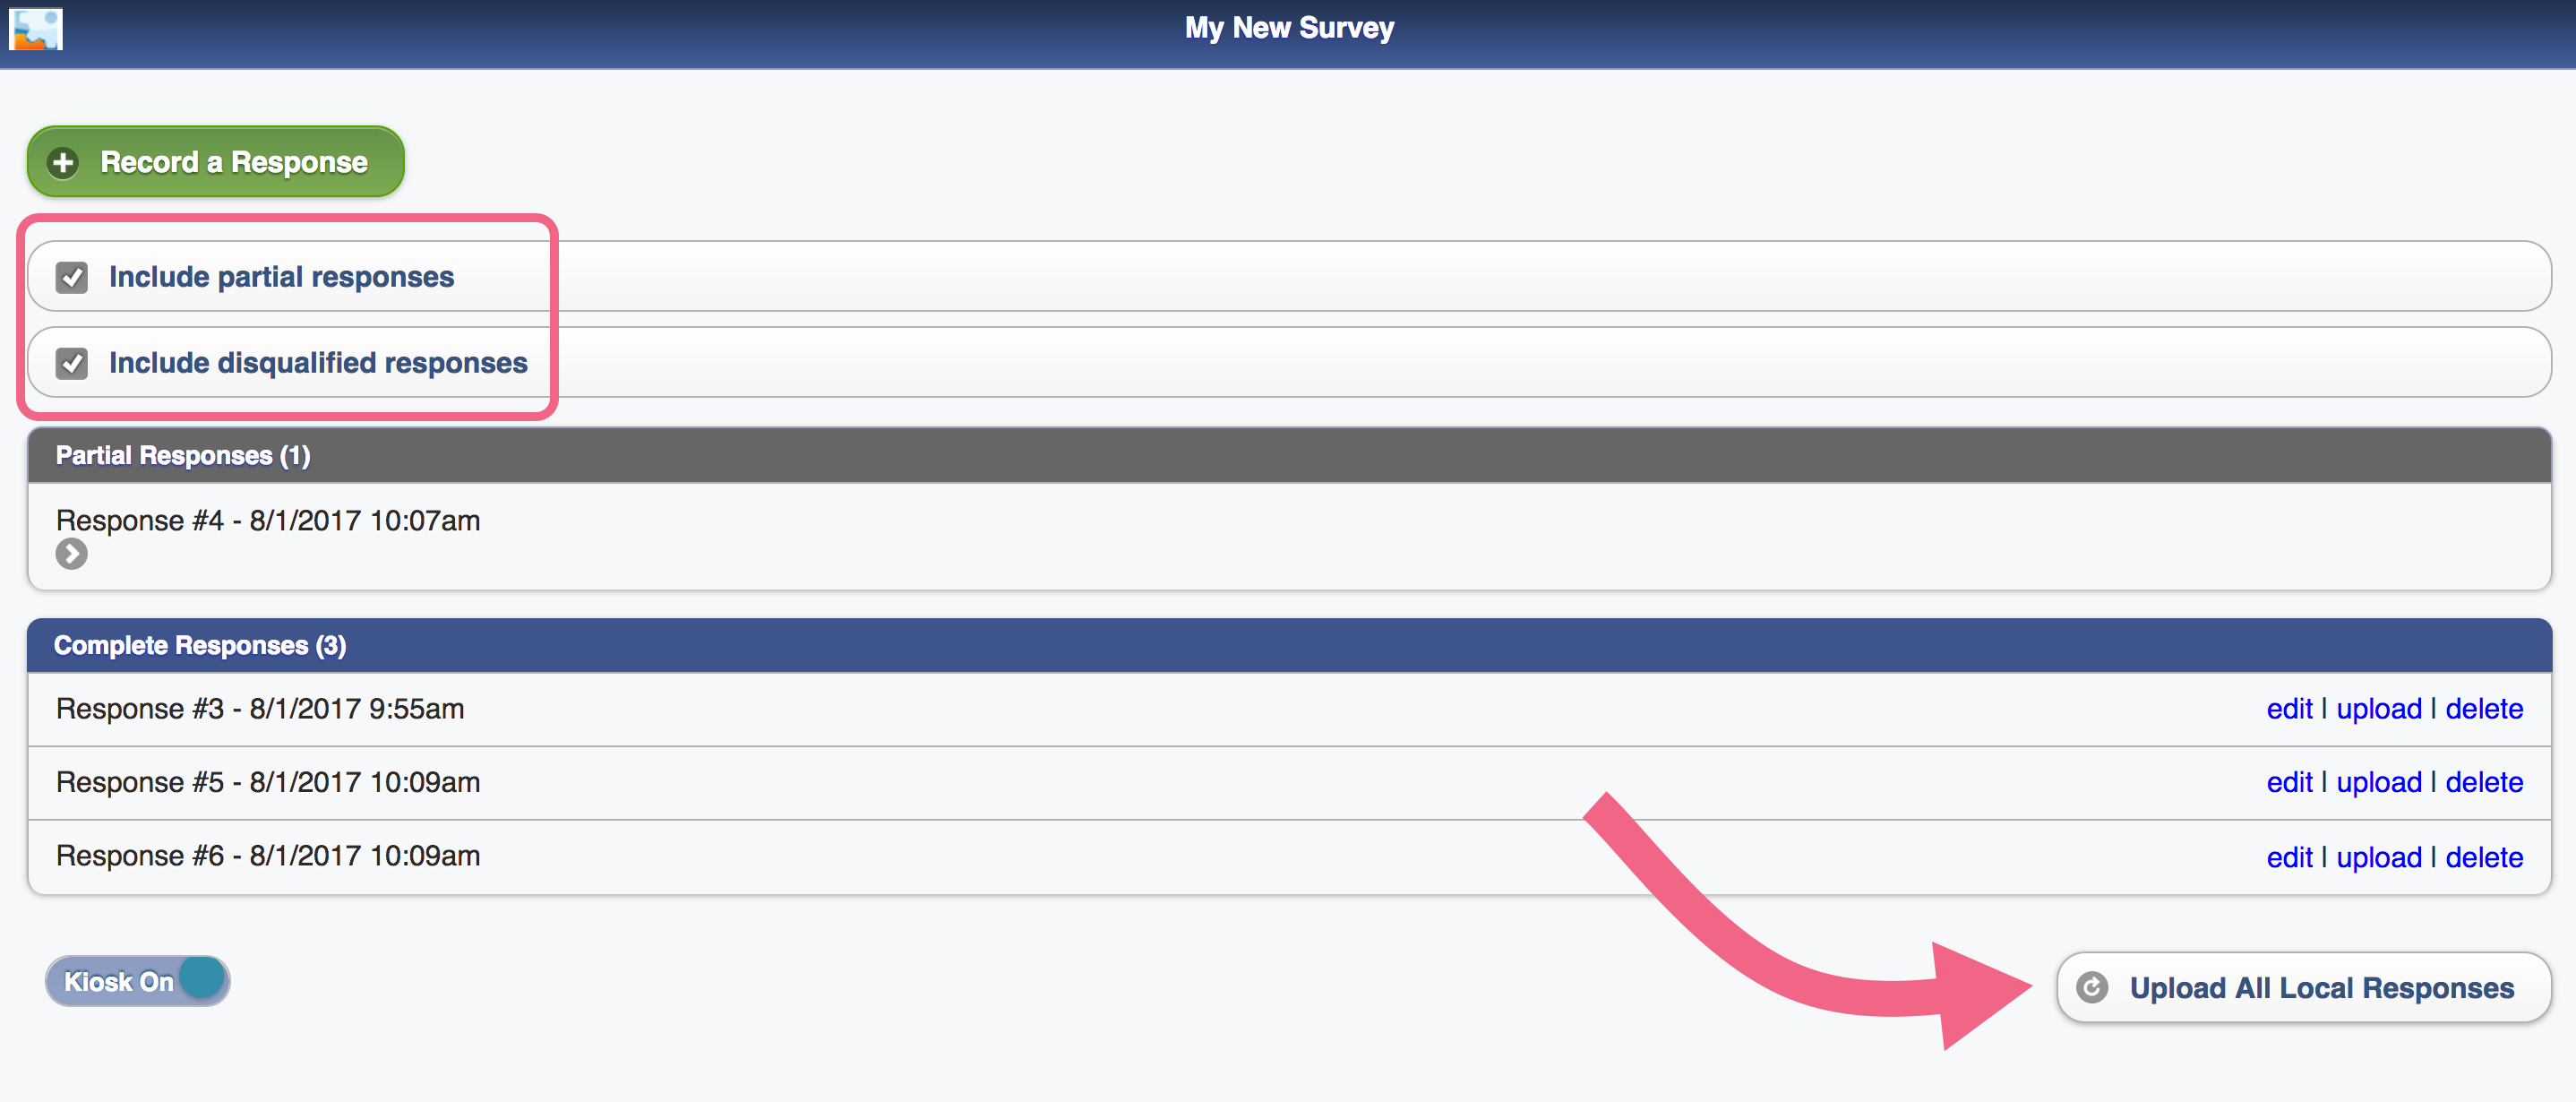
- Click Upload All Local Responses to upload ALL responses, including partial and disqualified responses. If you do not wish to upload partial responses, uncheck the Include partial responses option (you can also uncheck Include disqualified responses if you have those and wish to have them excluded from the upload).
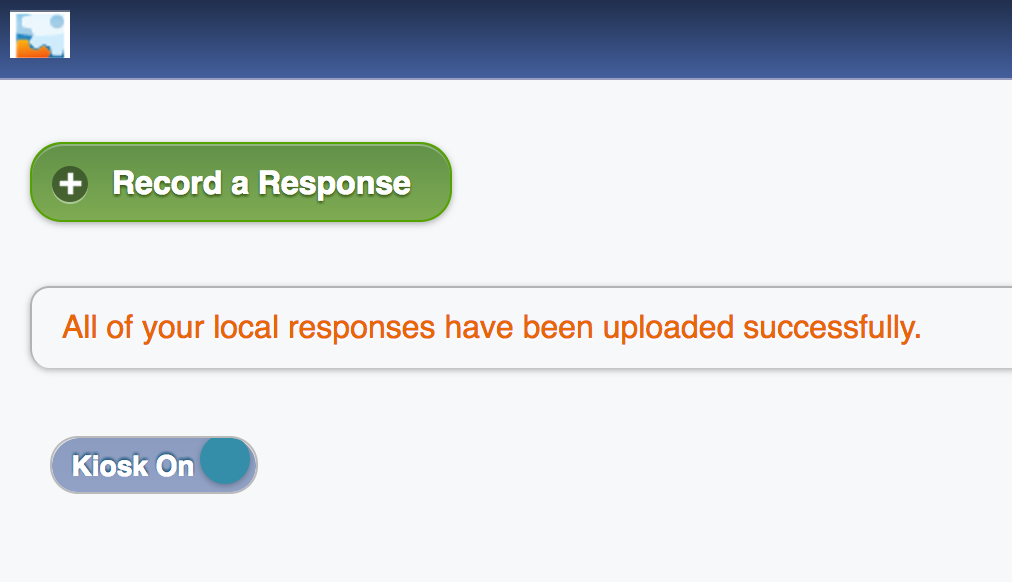
- You'll see the below message "all of your local responses have been uploaded successfully" confirming that your responses were uploaded.
Refresh the offline survey
From time to time, the offline survey may need to be updated. For example, let's say the survey administrator added some questions and answer options, and fixed some typos. These changes will not be automatically reflected in your offline survey, so you may be asked to refresh the offline link.
Follow these steps to refresh your offline survey:
- While connected to the internet, access the bookmarked offline link on your device.
- Below your list of responses, you will see a Refresh Survey button. Click this button to update your offline survey with any changes, such as new survey questions or answer options, text updates, etc.
 The Refresh Survey button will not be available if you are not connected to the internet.
 - After clicking the refresh button, you will see a confirmation dialogue. Click OK to confirm. Your survey will now include any changes since the last time you refreshed or downloaded the offline link.


 The Refresh Survey button will not be available if you are not connected to the internet.