Sub accounts are typically used for one of two reasons.
1. First, sub accounts can be used to manage surveys in a large organization.
Think of a national sports league, for example. The sports organization could have an overall master account and would be able to then create and manage sub accounts for all the teams. In doing so, they can control a number of aspects of the surveys that each team can build and distribute.
2. A second reason you might want to use sub accounts is to resell Alchemer.
Sub Account Settings
Once you are set up as a master account there are a number of settings available for controlling your sub accounts. To access these settings go to Account > User Management > Sub Accounts.
You'll see a Sub Account Overview which shows the following information:
- Total Active Users - this is the number of users across all of your sub accounts
- Total Surveys - total surveys across all sub accounts
- Total Active Sub Accounts - you will see how many sub accounts you are using over the number you have available
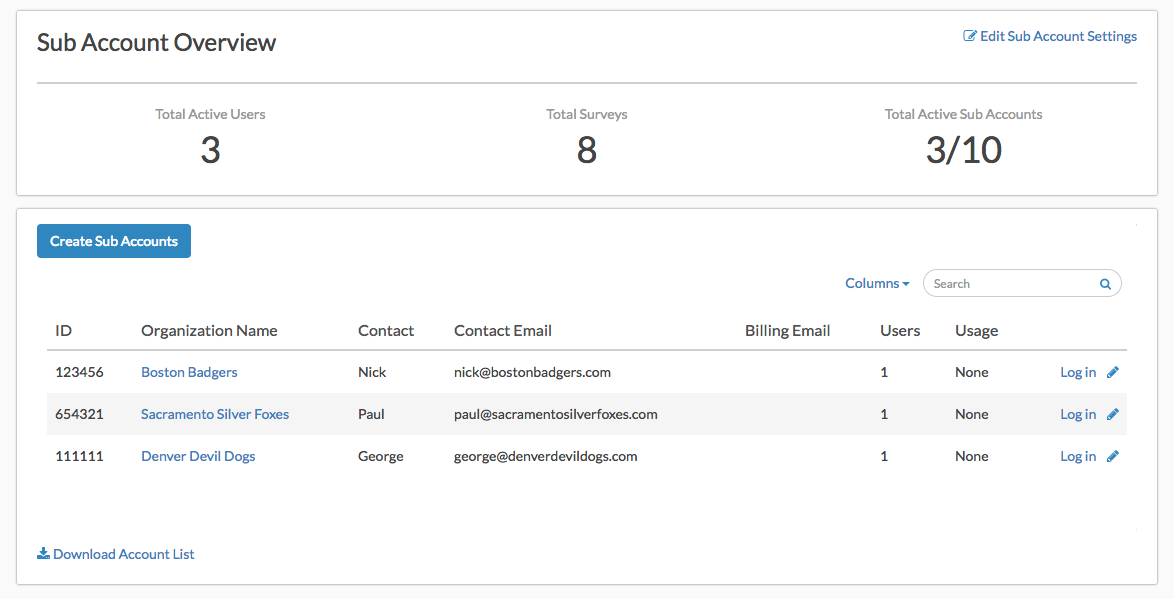
Account Administrators can now see their Sub Account metrics directly on their Account Summary page. These metrics will identically match the Sub Account Overview page. They are now conveniently located in a single location for Account Administrators to gain visibility into their account-wide data.

You can create sub accounts yourself by clicking the Create Sub Accounts button within your master account under Account > Sub Accounts, or Account > Account Summary. You can also have sub accounts create their accounts themselves using a sign-up page.
Click Edit Sub Account Settings to make changes to the various settings that control your sub accounts.
Sign Up Page Settings
The Sign Up Page and the Login Page for sub accounts can be fully branded on the Sign Up Page tab available under the Edit Sub Account Settings link.
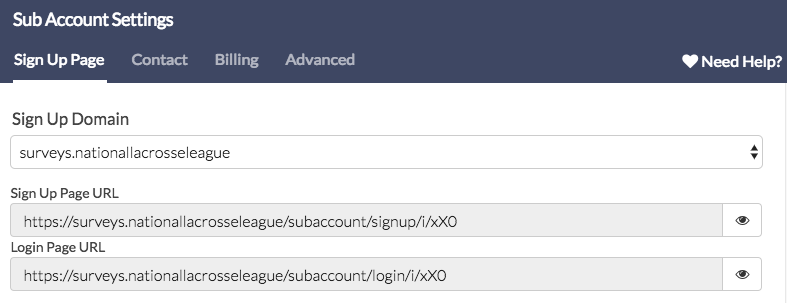
- The Sign Up Domain dropdown menu will default to app.alchemer.com. This menu will also populate with any private domains or subdomains you have set up in your master account.
- Once you've selected your Sign Up Domain your Sign Up Page URL and Login Page URL will reflect the domain you selected. These can then be shared with your sub account users.
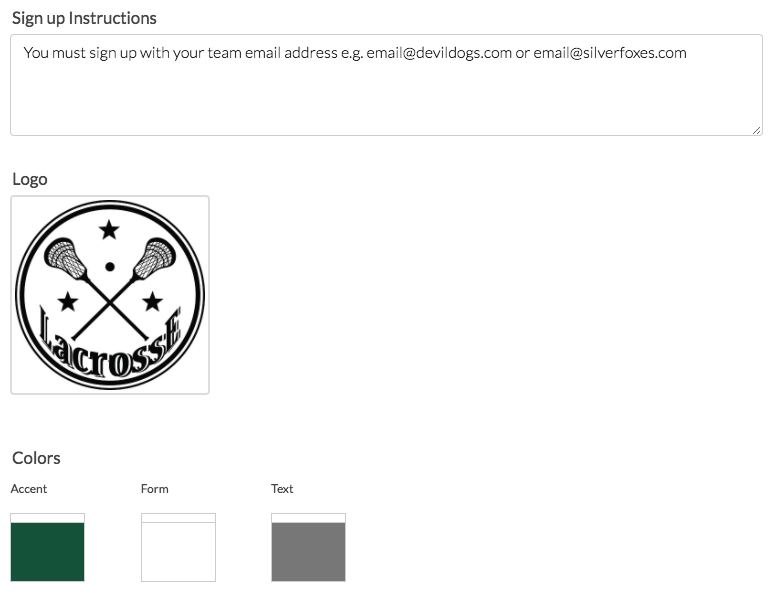
- You may also wish to add instructions for your sub account users in the Sign up Instructions field.
- Finally, you can add a Logo and customize the colors of your sign up and login pages.
Contact Settings
On the Contact tab customize your welcome email and support & documentation panel.
Within the Welcome Message field, you can customize the email message that will be sent to the email address associated with a new sub account.
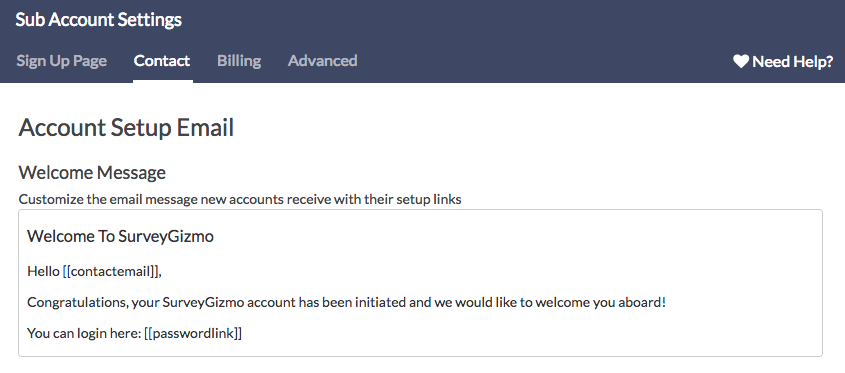
Below is the default message text. Text surrounded by double square brackets e.g., [[contactemail]] or [[passwordlink]] are merge codes that will dynamically populate for each recipient. DO NOT delete the [[passwordlink]] merge code from the message body as this is required to provide a working password reset link.
Welcome To Alchemer

Hello [[contactemail]],

Congratulations, your Alchemer account has been initiated and we would like to welcome you aboard!

You can login here:
[[passwordlink]]

(After you log in, you will be prompted to set a password. In the future, after you have a password, you can always login at [[baseurl]].)


Since you are new to Alchemer, here are some resources that may help you get started:

Getting Started Webinar
/help/getting-started-with-alchemer-webinar
Learn the Alchemer application in record time with this live interactive 60-minute webinar.

Easy Intro to Creating a Survey
/help/video-intro-to-alchemer-create-a-new-survey
Only have a few minutes to spare? This video will get you on your way to creating your first project.

Full Self Help Site
https://community.surveygizmo.com
A comprehensive guide to our application with videos and articles.

Need to speak to a real person?

Email: support@alchemer.com

Let us know if there is anything we can do to help you!

Cheers,
The Alchemer Team
Within the Support & Documentation Panel, set your support & documentation options.
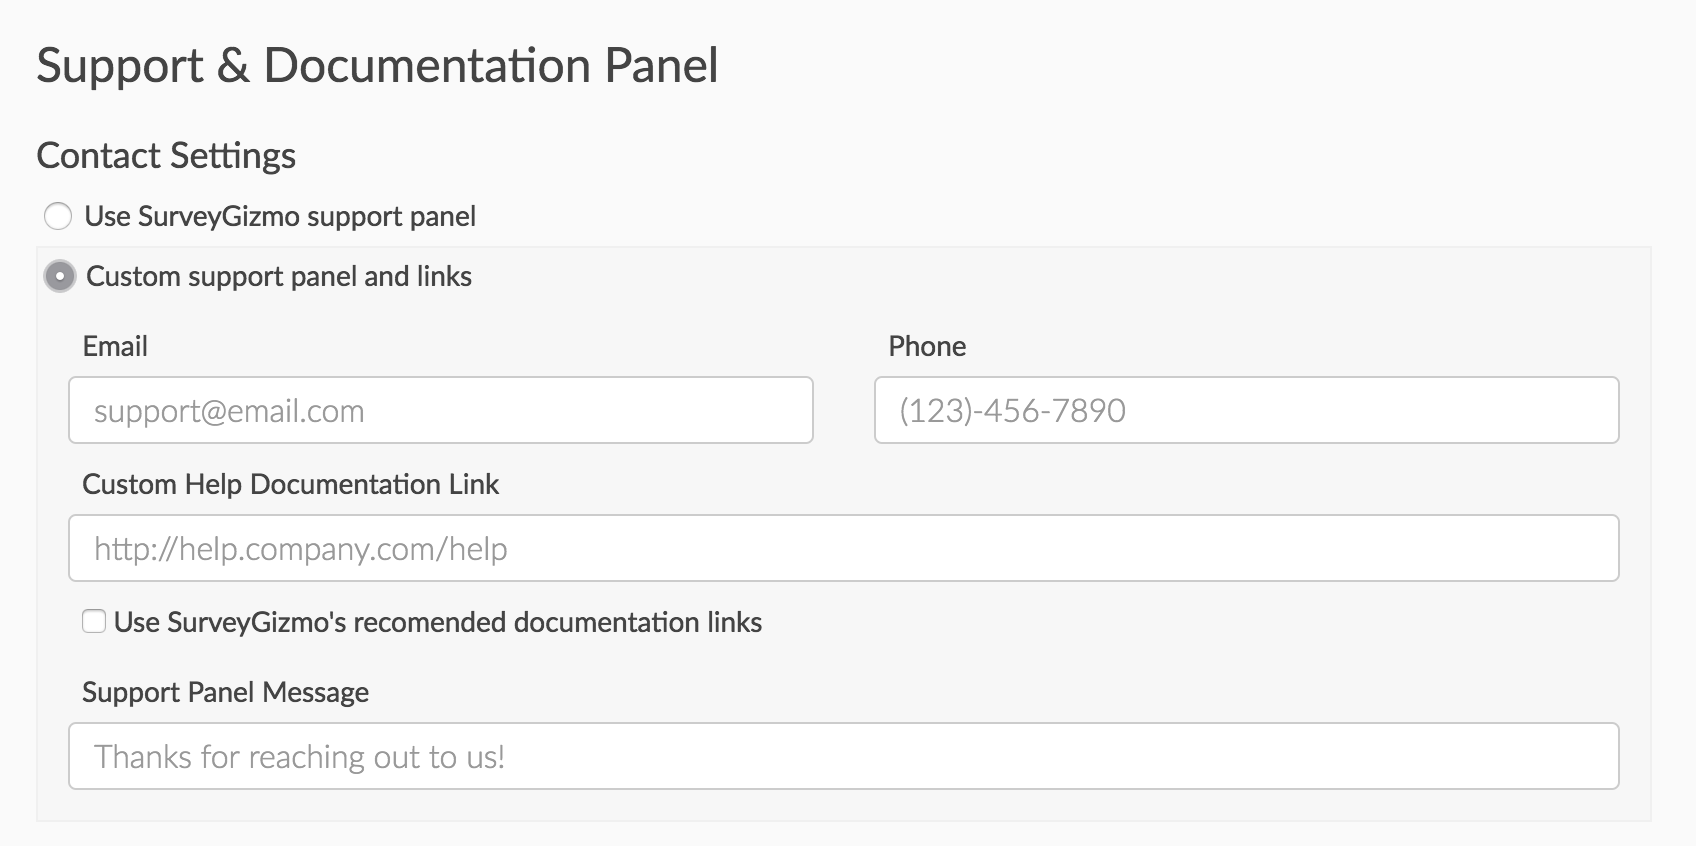
- Use Alchemer support panel - this default selection will result in Alchemer's default Need Help options being presented to users who click on Need Help.
- Custom support panel and links - this selection will allow you to override Alchemer's default help option.
- Input a custom support email address into the Email field.
- Provide a custom support phone number in the Phone field.
- Use the Custom Help Documentation Link to provide a link to your custom help documentation. Select the option to Use Alchemer's recommended documentation links to have Alchemer suggest help articles based on the page that Need Help is accessed from.
- Last, the Support Panel Message field will allow you to customize the confirmation text that is displayed once a support ticket is submitted.
Billing Settings
On the Billing tab, you can set up how sub accounts are paid for, as well as, the default sub account license types.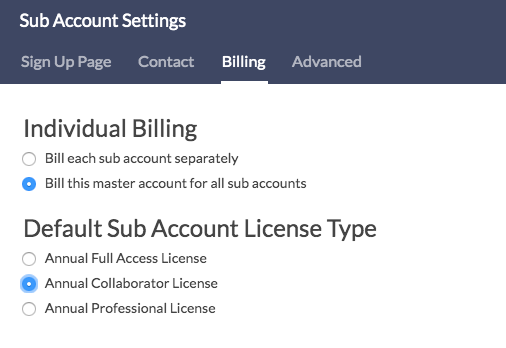
- Sub accounts can be billed separately or billed to the master account.
- In addition to how sub accounts are billed, you can then select a Default Sub Account License Type. Choose from:
- Collaboration
- Professional
- Full Access
Advanced Settings
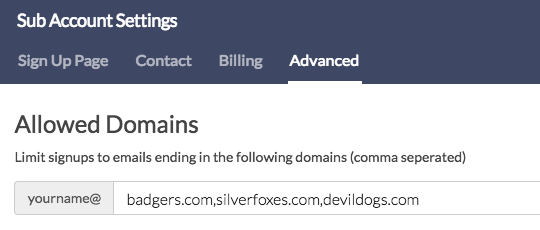
On the Advanced tab, there are settings to further control your sub-accounts, including Allowed Domains, Account Approval settings, Theme limit settings, Password words, and more.
Allowed Domain Settings
Using the Allowed Domains you can limit sub account signups to specific domains. Specify your domains in a comma-separated list.
Account Approval Options
If you would like further control over sub-account signups select Before they can be used, accounts must be approved under Account Approval. This will provide you with an email address

Limiting Themes
If you wish to limit the survey themes that a sub account can apply to their surveys select Limit use to specific themes in your Library under Limit Themes and select the themes you wish to make available in sub accounts.
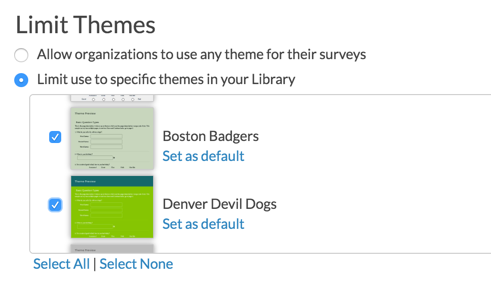
In addition to limiting Sub Accounts to only specific themes, you can determine a Default Theme that will be applied to each newly created survey within the Sub Account. To do so, click the Set as default link associated with a theme. Click the link again or set a different theme as default to un-set the default setting.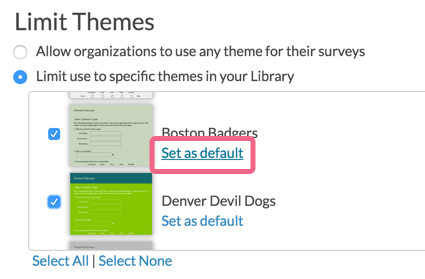
Password Rules
If you wish to enforce the password security settings you have set up in your master account select the option to Enforce this master account's security setting on all sub accounts under Password Rules.
Duplicate User Logins
Last, if users on the Sub Account already have other Alchemer accounts associated with their email address (or if you want to allow them to use the same email with multiple accounts), make sure to check the setting to Allow users of this account and all associated sub accounts to reuse email logins already associated with other Alchemer accounts.
If users do have multiple accounts with the same email address, our system will ask you which account you wish to login to. Simply click Use this account on the account you wish to use, enter your password and click Log In. Learn more!
Managing Sub Accounts
Once you have your sub accounts up and running you'll be able to manage them under Account > Sub Accounts, as well as Account > Account Summary.
Here you'll see a Sub Account Overview which shows the Total Active Users and Total Surveys across all your sub accounts. Under Total Active Sub Accounts you'll see how many sub-accounts you are using over the number you have available.
Below the overview will be a list of all sub accounts along with their relevant contact and billing information. The ID field here is the Account ID # of the sub account. This sub account information can be downloaded via the Download Account List link found below the sub account list.

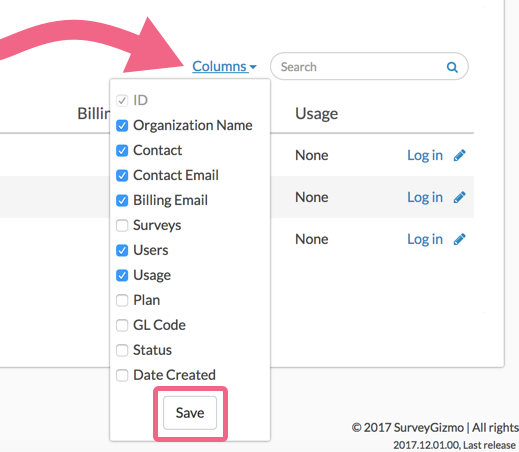
If the default columns that are visible are not exactly what you need, you are free to customize these.
- Click the Columns link to the left of the search bar.
- Select/un-select the columns that you need and Save your changes. Note that the ID column is always visible.
Creating Sub Accounts
From the Sub Account Overview click the Create Sub Accounts button. This will pop up a form for you to populate with an account name and a user's email address. Your standard welcome email as customized on the Contact tab of your Sub account Settings will also display here for you to customize should you need to make small edits for each sub account.
When you click Create Account the contents of this email will be sent to the email address you specified allowing them to log in to their new sub account!

Logging in to Sub Accounts
On the far right of each sub account, you'll have a link to Log in. This will log you into the sub-account as the administrative user, which means you'll have full access to surveys and users in the sub account.
When you are logged into a sub account you will have a purple banner across the top of the page indicating that you are logged into one of your sub accounts. When you wish to switch back to your master account simply click the Return to main account link.

If the sub account has sensitive information that you should not be able to access you can click the pencil icon to edit the sub account's settings and select the option to Block admin login from this screen.
Editing Sub Accounts from the Sub Accounts Screen
On the far right of each sub account, you'll have a pencil icon to make edits to the sub account.
- The sub account edit options on this screen include the ability to change the Sub Account Name, Contact Name, Contact Email, Billing Email, GL Code (general ledger code).
- You can also block the master account's ability to login from the sub accounts screen under Sensitive Information.
- Finally, you can make a sub-account inactive under Sub Account Status.


What is the experience like for sub account users?
Sub account users will have a unique sign up experience as per your sub account settings.
If the master account administrative user creates the sub accounts the sub account user will receive an email with the login link and the customized email message.
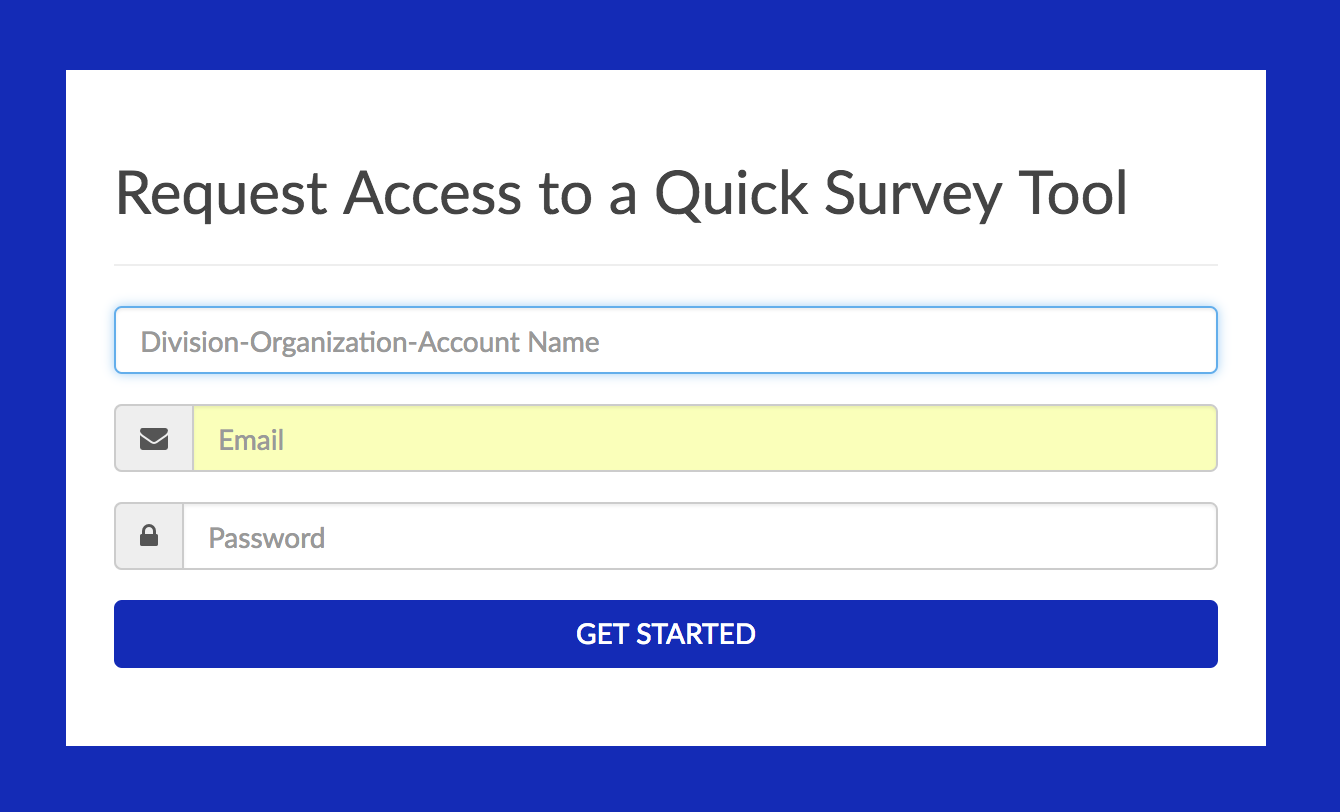
If you prefer to have sub accounts sign up themselves you can do so by sharing the Sign Up Page URL available under the Edit Sub Account Settings link on the Sub Account Overview. From here they will enter an account name, their email address, and a password. This will create the account and log them in.
If the master account billing is set to Bill each sub account separately, the sub account will display the trial banner. As such, they will be able to set up their own billing information.
Beyond this, their experience using Alchemer should be unaffected!
Share Survey Templates with Sub Accounts
As a Master Account administrator, you can share survey templates with your sub accounts. This is particularly useful if you need to use standardized surveys across sub accounts.
When you share a template with a sub account, you allow that account to create a survey with that template as a starting point. The template includes the survey build and style, but does not include response data.
Share Template with Sub Account
It's important to note that when a survey is configured as a template, it is no longer considered an active survey and cannot collect responses. As such, as a best practice we recommend making a copy of the survey and setting the copy (not the original survey) as the template. You can also build a survey from scratch with the intention of using it as a template. In this case, you do not need to copy the survey.
To allow a sub account to access and use one of the master account templates, follow these steps.
- Access the survey (or copy) that you want to set as a template.
- Click Tools > Survey Settings.
- Locate the Template section and click the checkbox to Make this a template.
- You will see a Template Access section appear. Here, you can select which sub accounts will have access to the template. Choose All Sub Accounts to open the template to all of your sub accounts, or select specific accounts individually by checking their respective checkboxes.
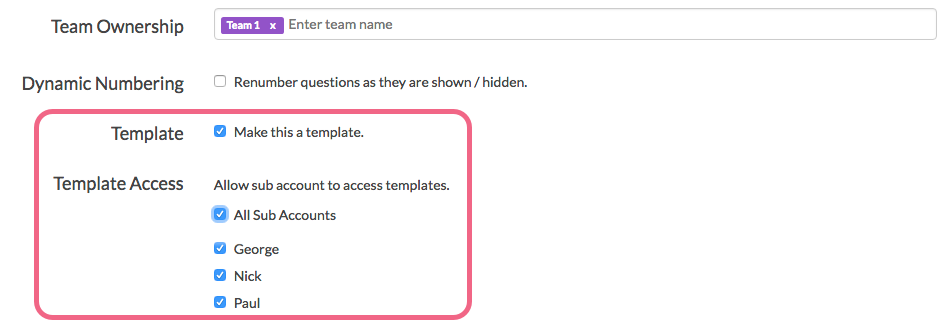
- Save Settings to finish the process.
Sub Accounts - Access Shared Templates
If the Master Account has shared a template with your Sub Account, you can now create surveys based on that template.
- To do so, click Create a Survey on your Alchemer home page.
- Rather than starting with a Blank Survey, click Use a Template.
- Next, click the Custom Templates dropdown to view all of the templates that have been shared with you.
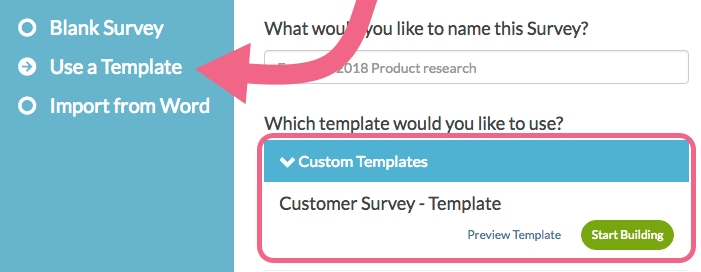
- Click Start Building to use the template.


